In OIM 11gR2 PS3 normal end user doesn’t have capability to raise request for other user. By default they can only raise request for themselves. To enable the feature developer need to create a custom admin role with provision account capability and assign user to that role.
Below process will describe the scenario how to create the admin role for end user, so that they can raise request for Application and Entitlements.
- Login to identity self-service console using xelsysadm.
- Go to manage and click on Administration Roles.
3. Click on create
4. Provide name, Display Name and Description and click on Next
5. Click on Add Capabilities.
6. Select the below capabilities and click on Add Selected (you can also add other capabilities as per the requirements)
- Provision Account
- Revoke Account Entitlements
- View Provisioned Accounts
- View Accounts Entitlements
- Deprovision Accounts
- Disable Provisioned Accounts
- Enable Provisioned Accounts
- Grant Account Entitlements.
7. Click on Select to select all the capabilities.
8. Click on Next.
9. In the member page click on Add Rule.
10. Add the below rule by Expression (You can also change the rule as per the business need)
User Type = EMP
11. Once the rule is selected, click on Next.
12. In the Scope Of Control page you can specify the Organization that can be managed by this admin role. If not you can simply skip this option and click on Next.
13. In the organization page select the organization which will publish that role. Once done click on Next.
14. Check the summary page and click on Finish.
15. New admin role has been created, and it is visible in the admin role list.
Assign user to Admin Role
1. In the identity self-service page go to Organization
2. Search and open the organization selected during the Admin role creation (To Publish the admin role).
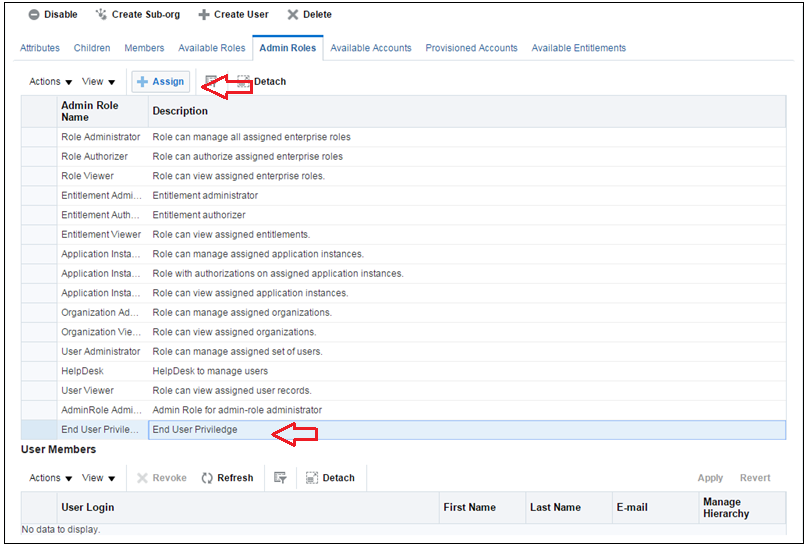
3. Click on the Admin Role tab.
4. Select the newly created Admin Role and click on Assign.

5. Select users you want add as a member of this admin role.

5. Select users you want add as a member of this admin role.
6. Once users are selected close the organization tab.
7. Logout from xelsysadm and login using normal user id.


No comments:
Post a Comment